WooCommerce - Installation guide
Introduction
Mondu plugin for WooCommerce makes it possible for merchants to offer a Mondu BNPL (Buy now, pay later) service to B2B customers.
The Mondu BNPL will be offered at checkout as an additional payment method.
Customers can use the convenient 30-day delayed payment option, while the merchant will be paid shortly after shipment of the goods or provision of the services.
In this process, Mondu takes the full credit risk and will also handle dunning and payment reminders.
Installation guidelines
System requirements
Developed and tested on WooCommerce 6.5.1.
Source Code
Plugin source code can be found at Github.
Mondu’s API Key
To properly configure the plugin after installation you will require an API key provided by Mondu. If you do not have one please contact us by clicking here.
Features
Mondu’s plugin for WooCommerce implements following features
- Create Order
- Adjust Order
- Cancel Order
- Create Invoice
- Cancel Invoice
- Order Webhook
providing full support of the order live cycle.
Installation
The plugin can be installed via WooCommerce build-in plugin manager.
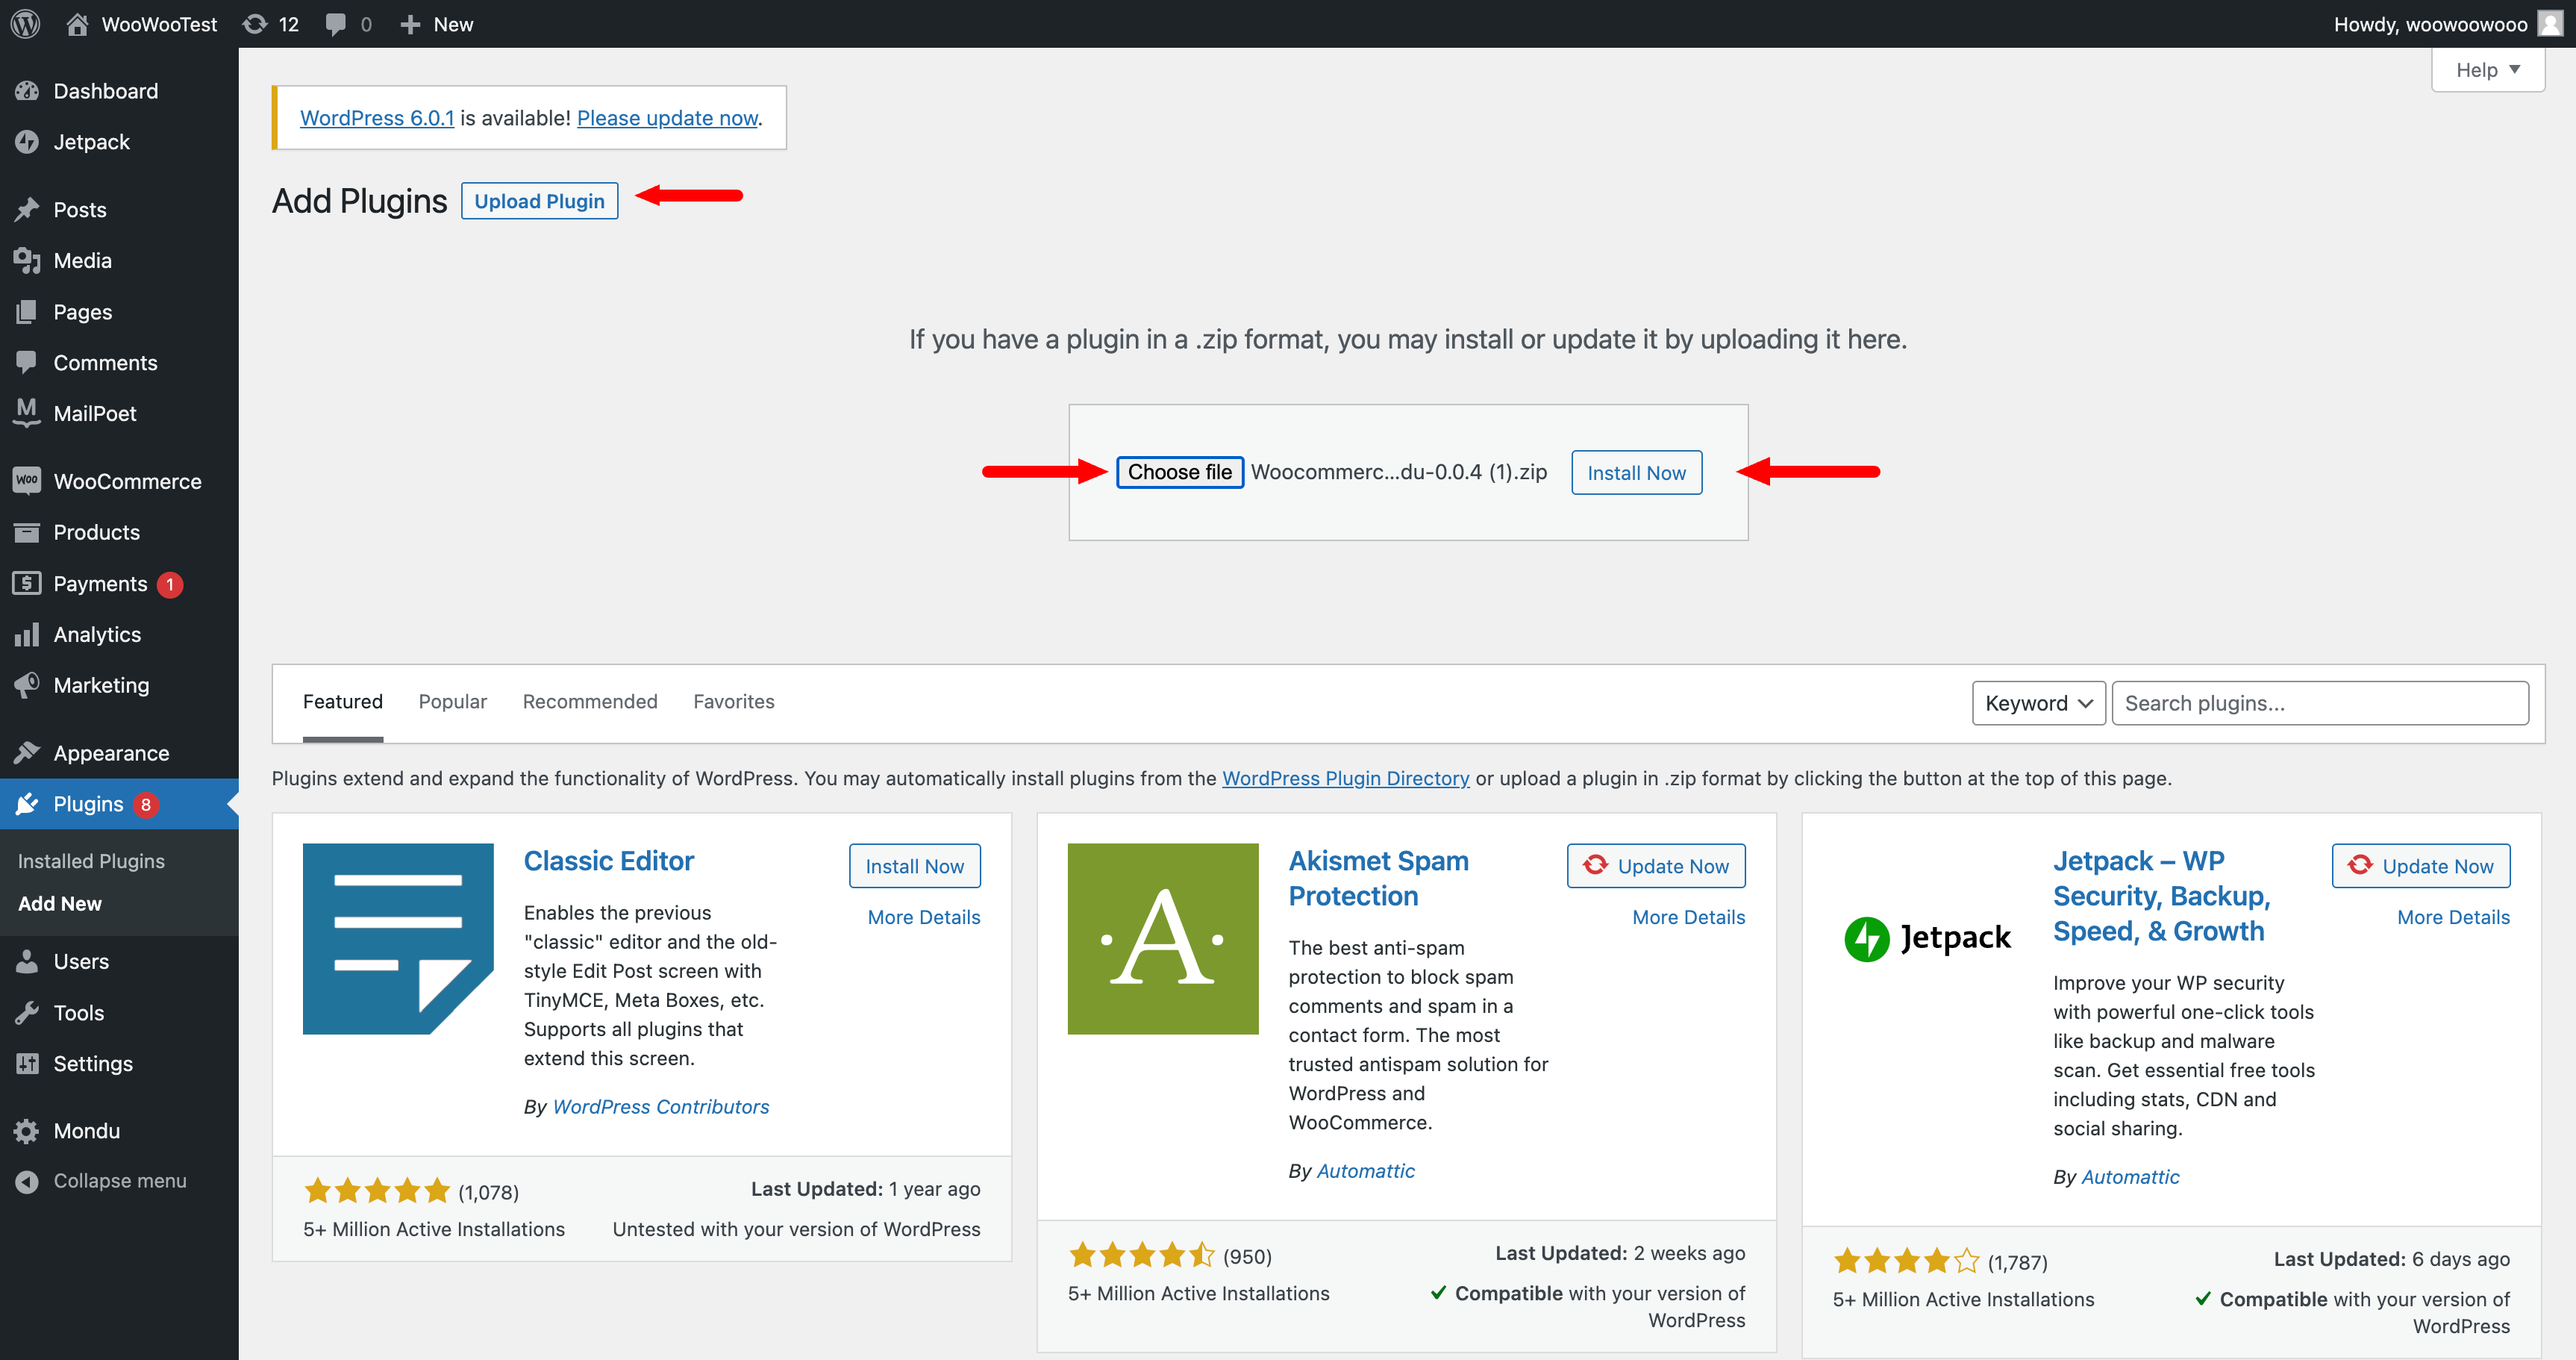
Click on the upload plugin button and upload a ZIP file that can be found here.
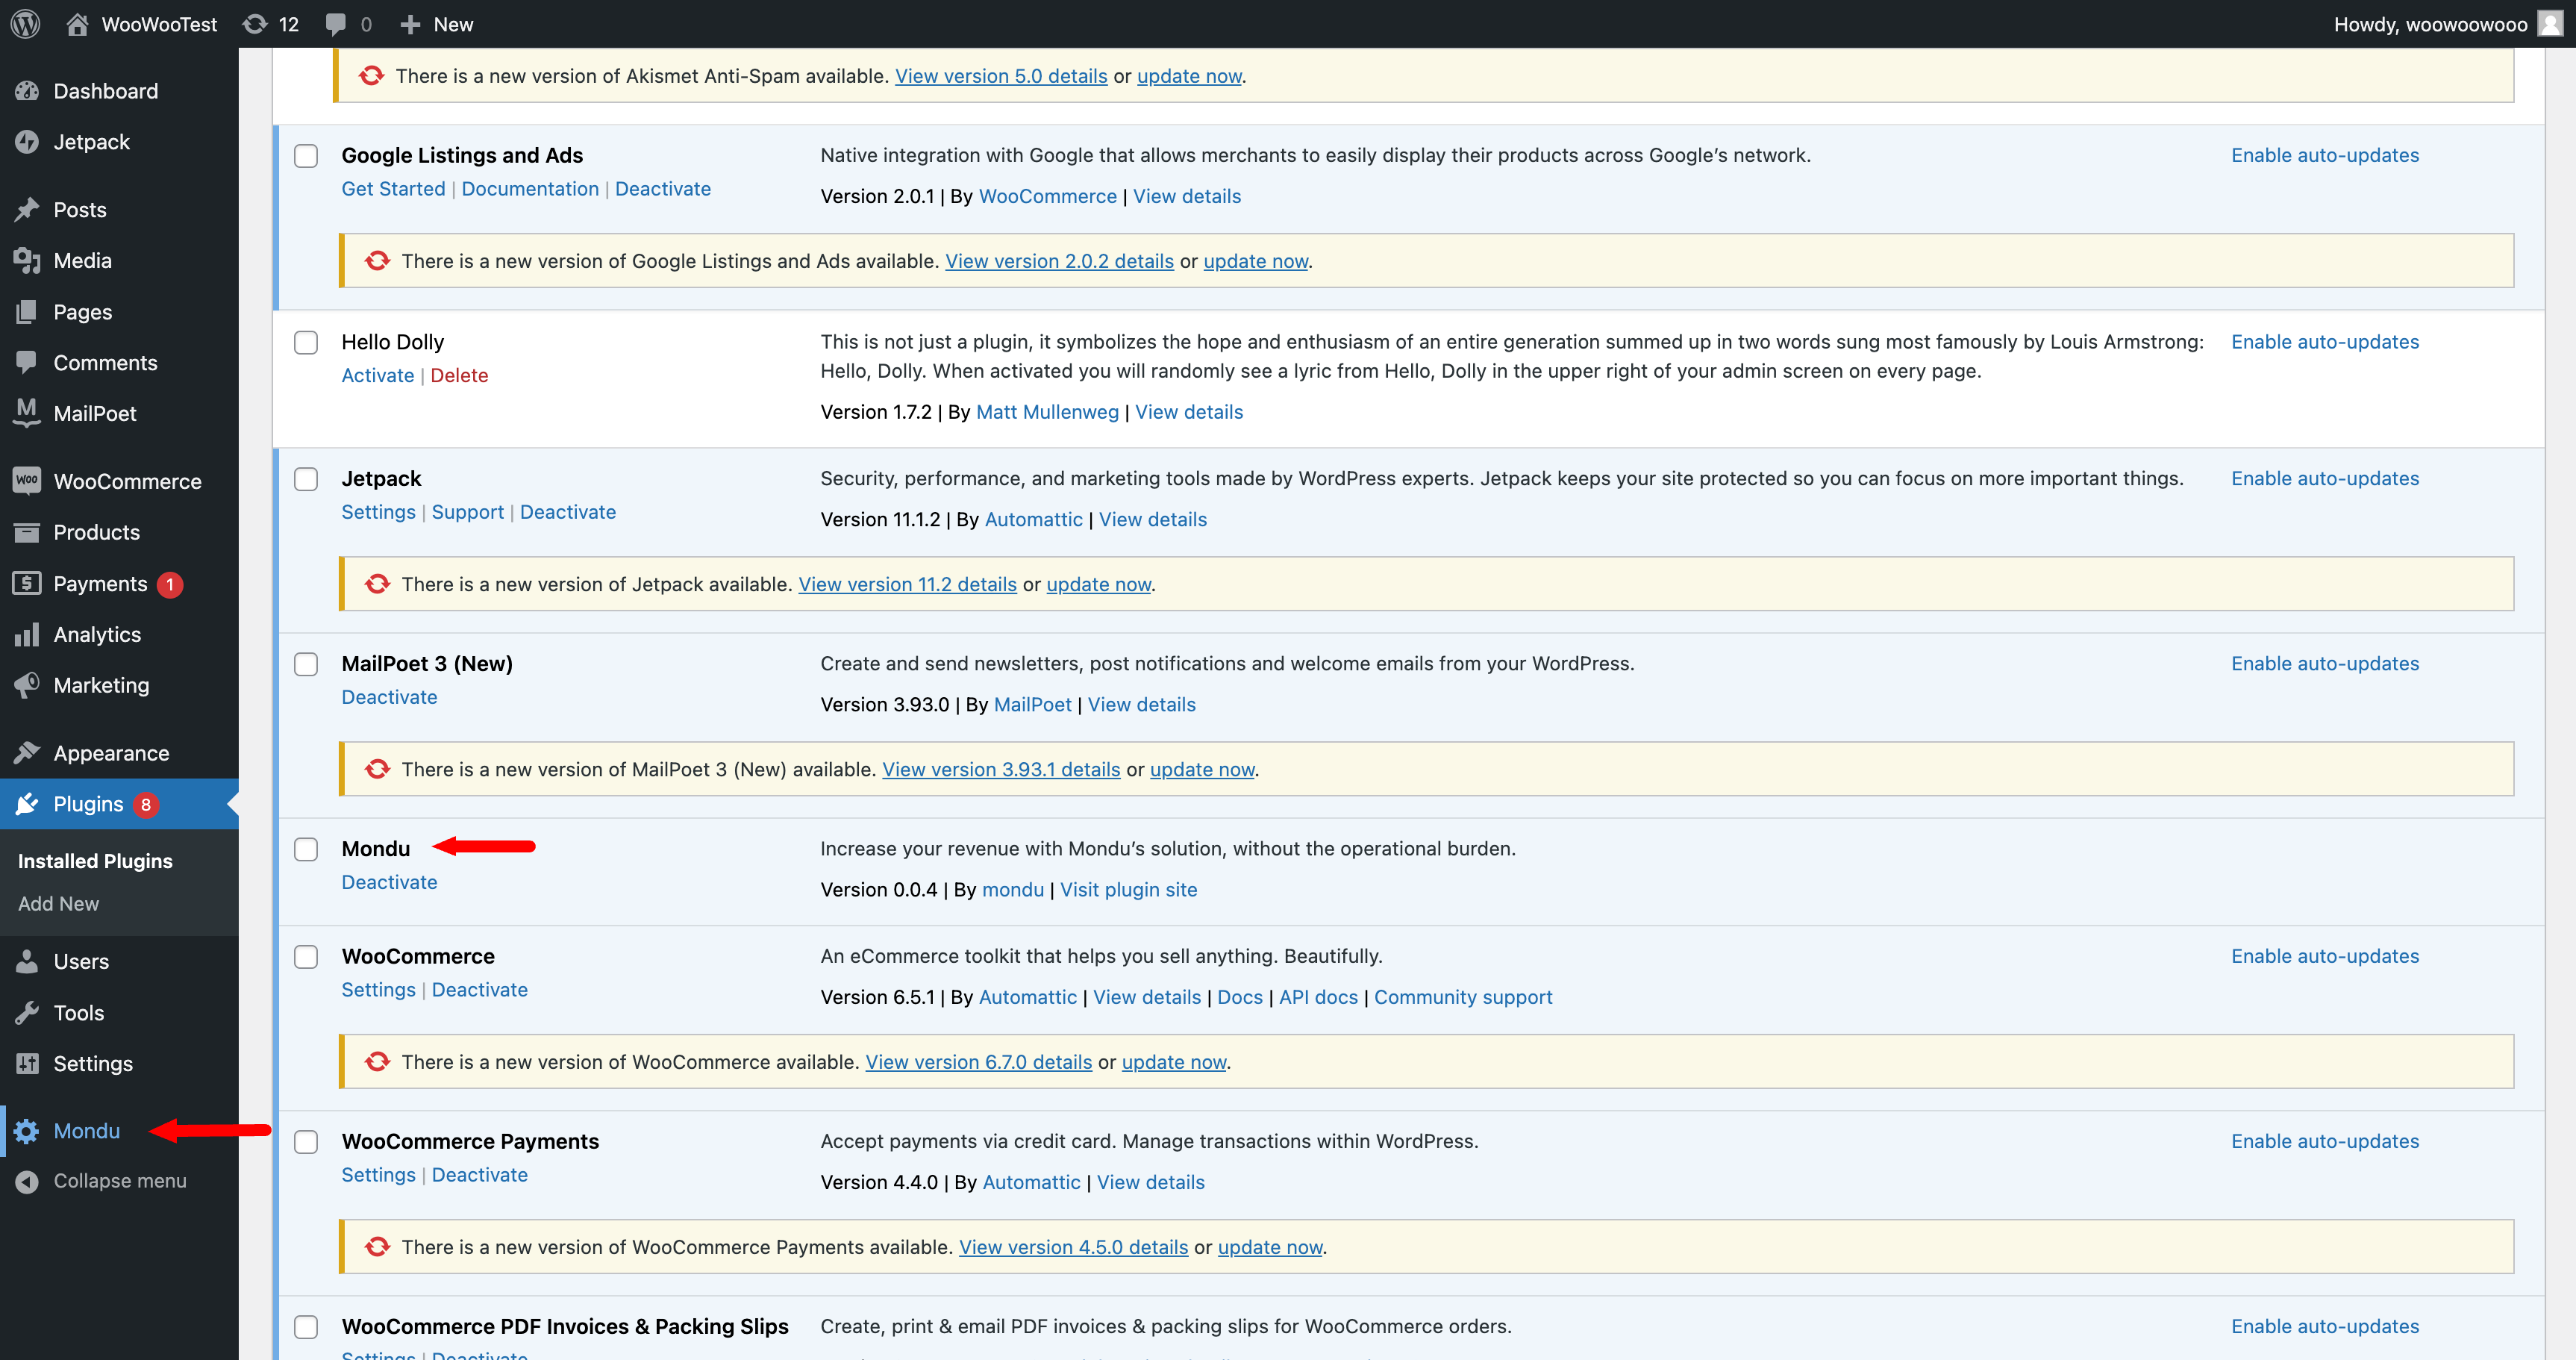
After successful installation, the Mondu Payment plugin should be available in the WorldPress admin main bar.
Configuration
Plugin configuration
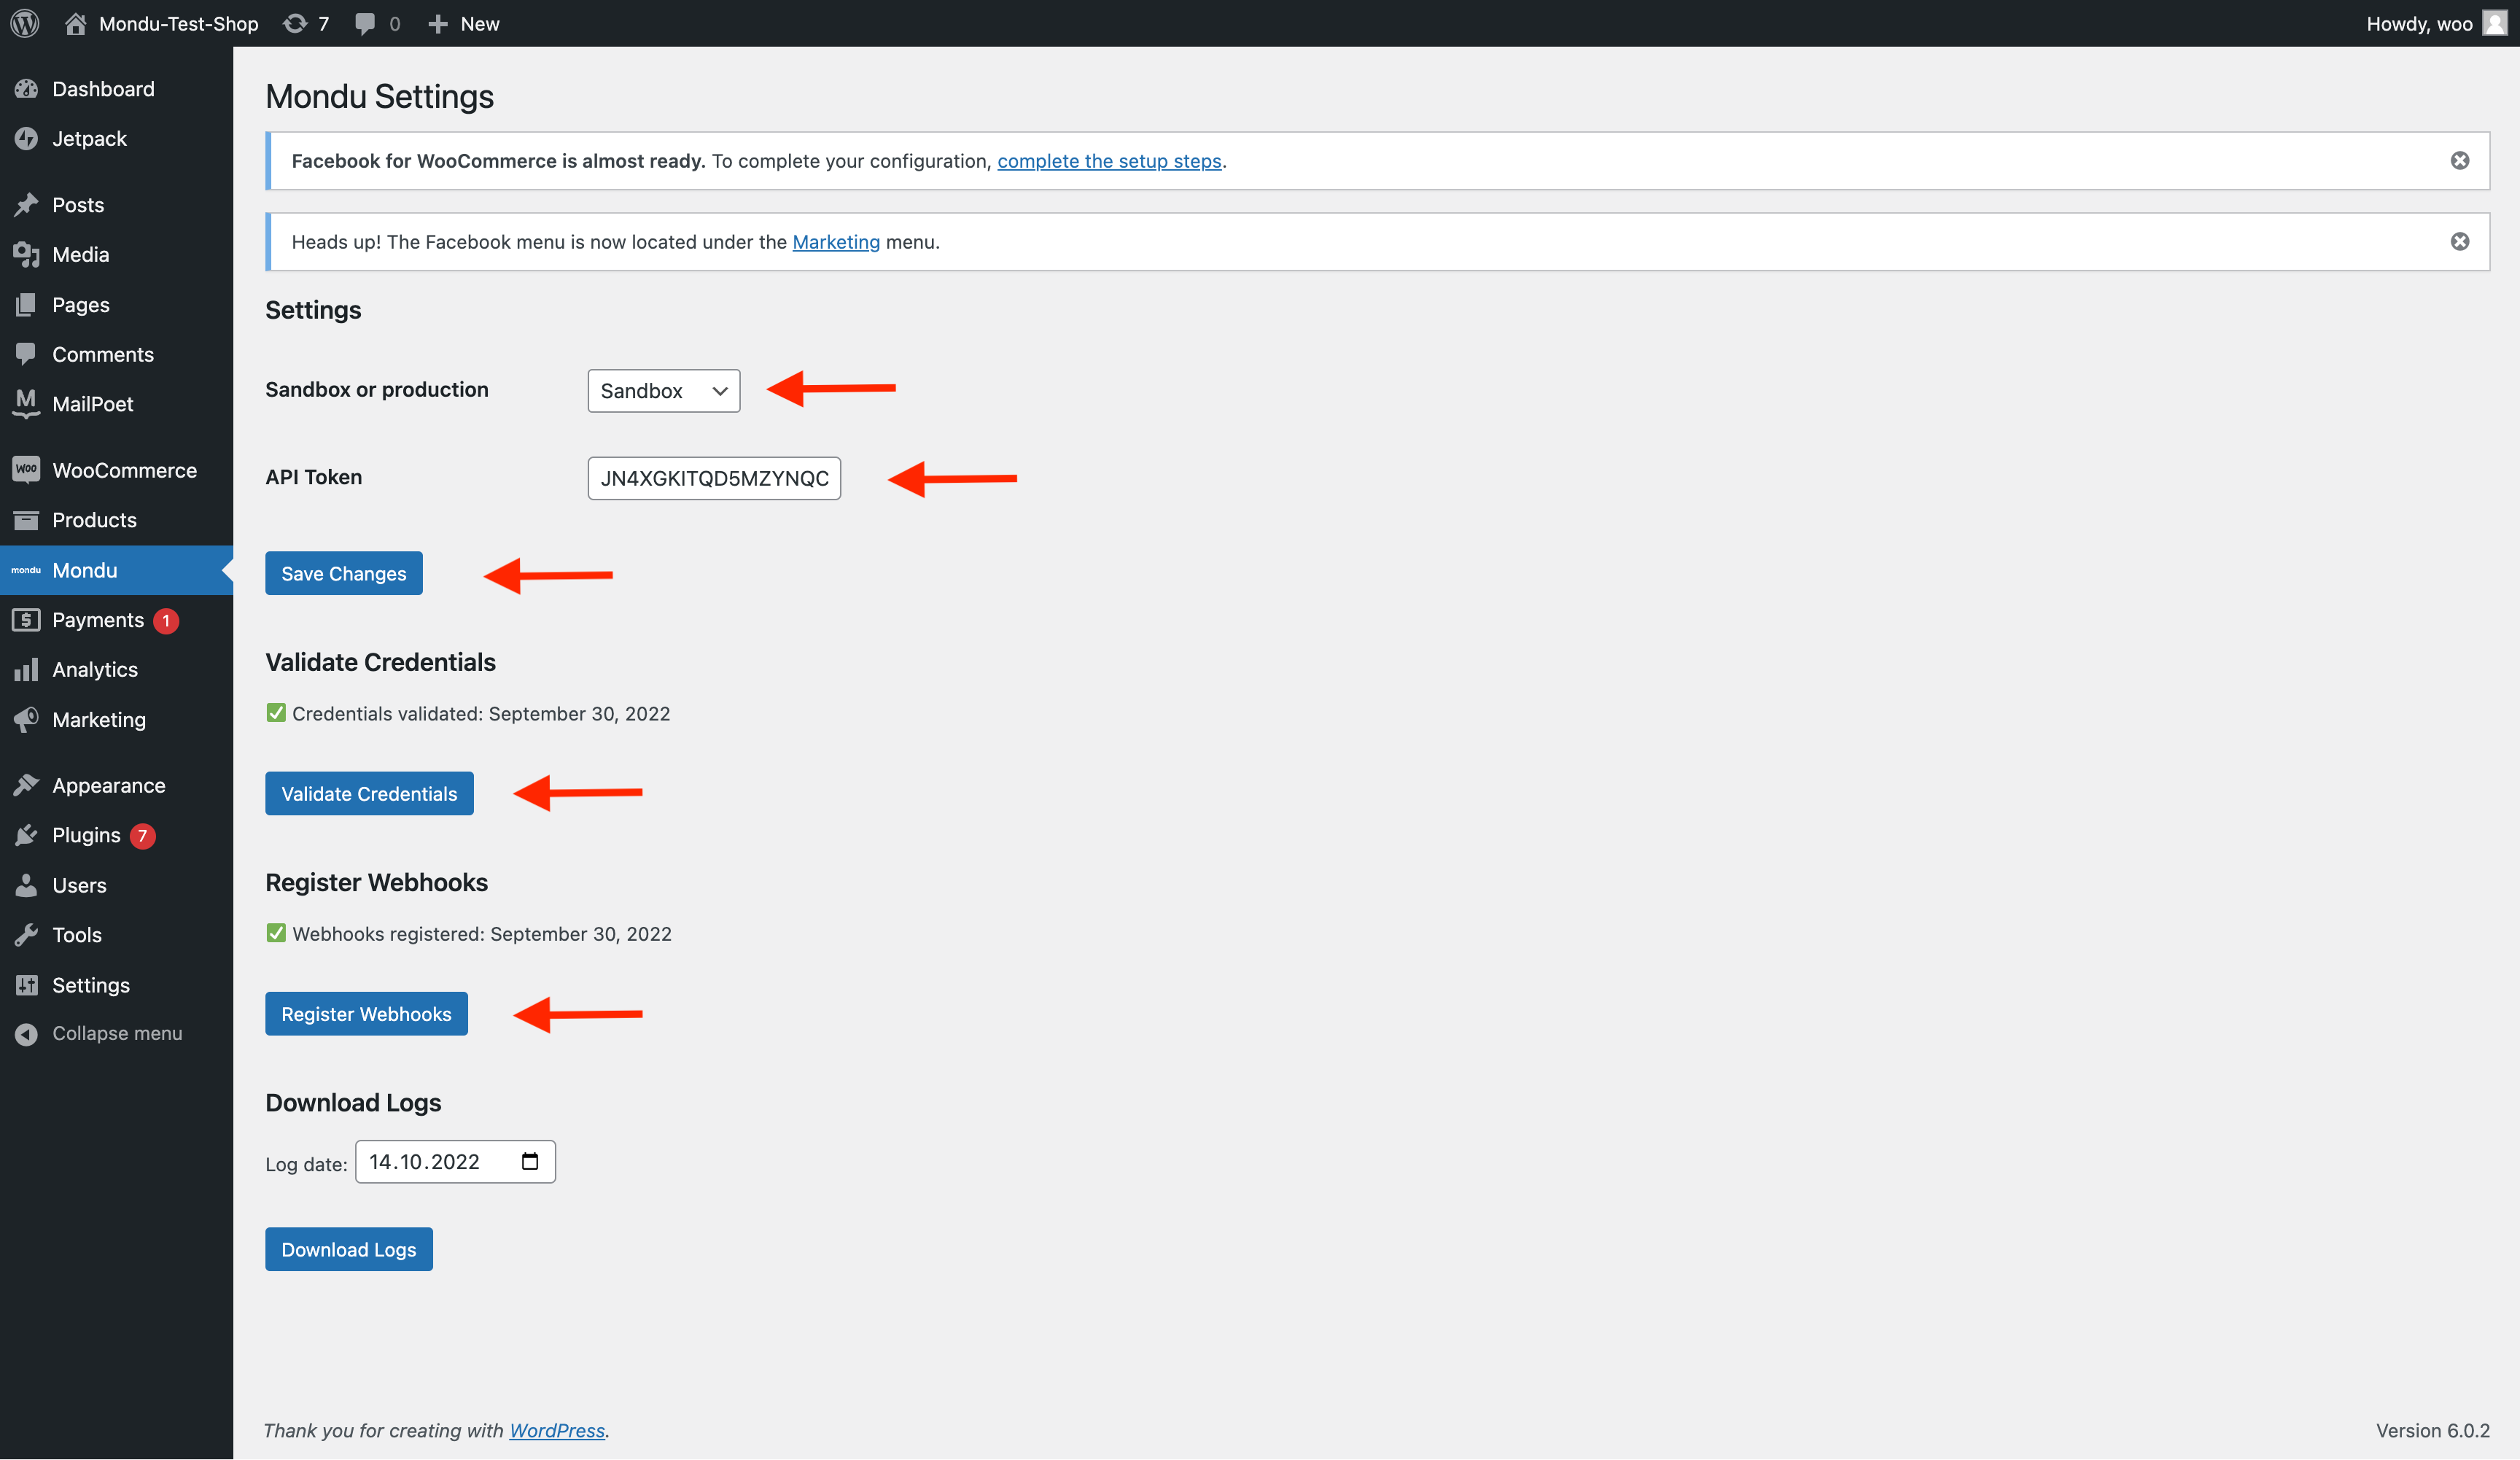
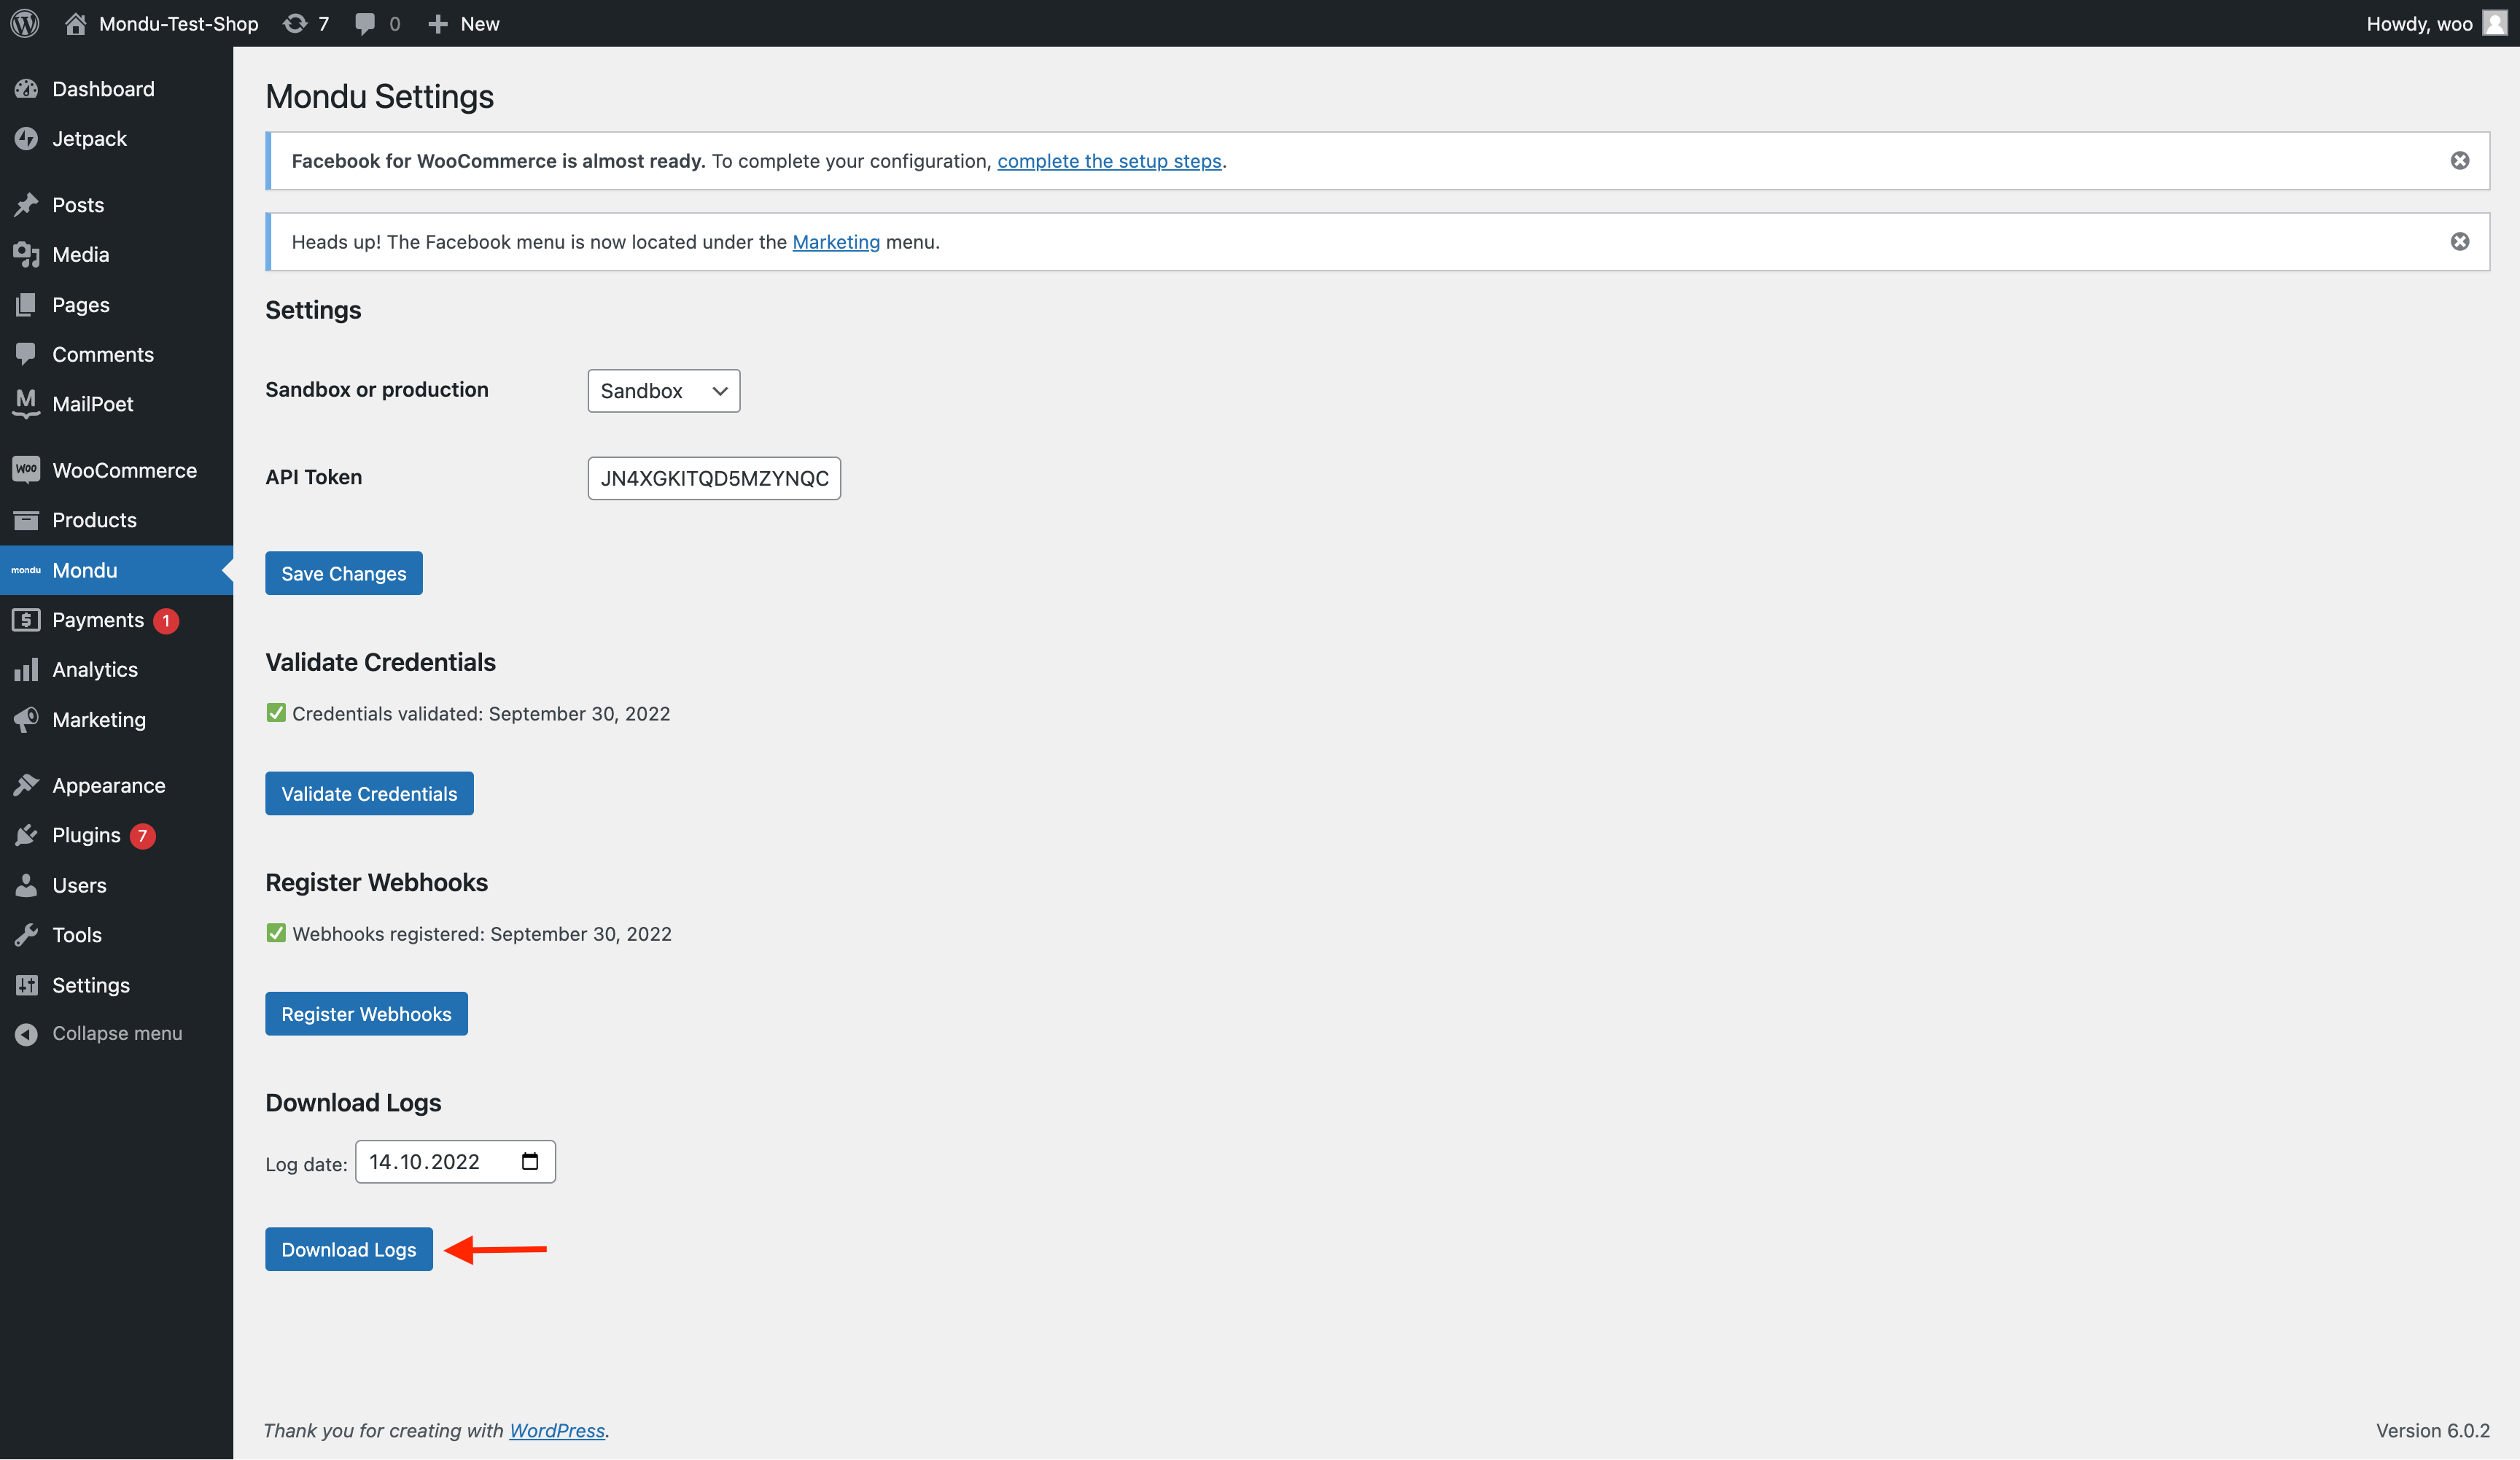
- Login to WooCommerce Admin Panel and open the Mondu tab.
- Sandbox or production: Choose between Sandbox and production Mondu environment. Please use sandbox for testing.
- API Token: Set the key provided by Mondu that corresponds to the sandbox or production environment.
- Save Changes: Click to save the chosen environment and corresponding API key.
Validate Credentials: Click to verify, if the credentials are valid for the environment you use. - Register Webhooks: Click to register Wehooks in Mondu System.
- Download logs: Download logs in case of troubleshooting.
Payment settings
- Open the WooCommerce tab in the WordPress main bar, click on settings and finally choose the Payments tab.
- Activate all relevant Mondu payment methods.
- Click the Save Changes button.
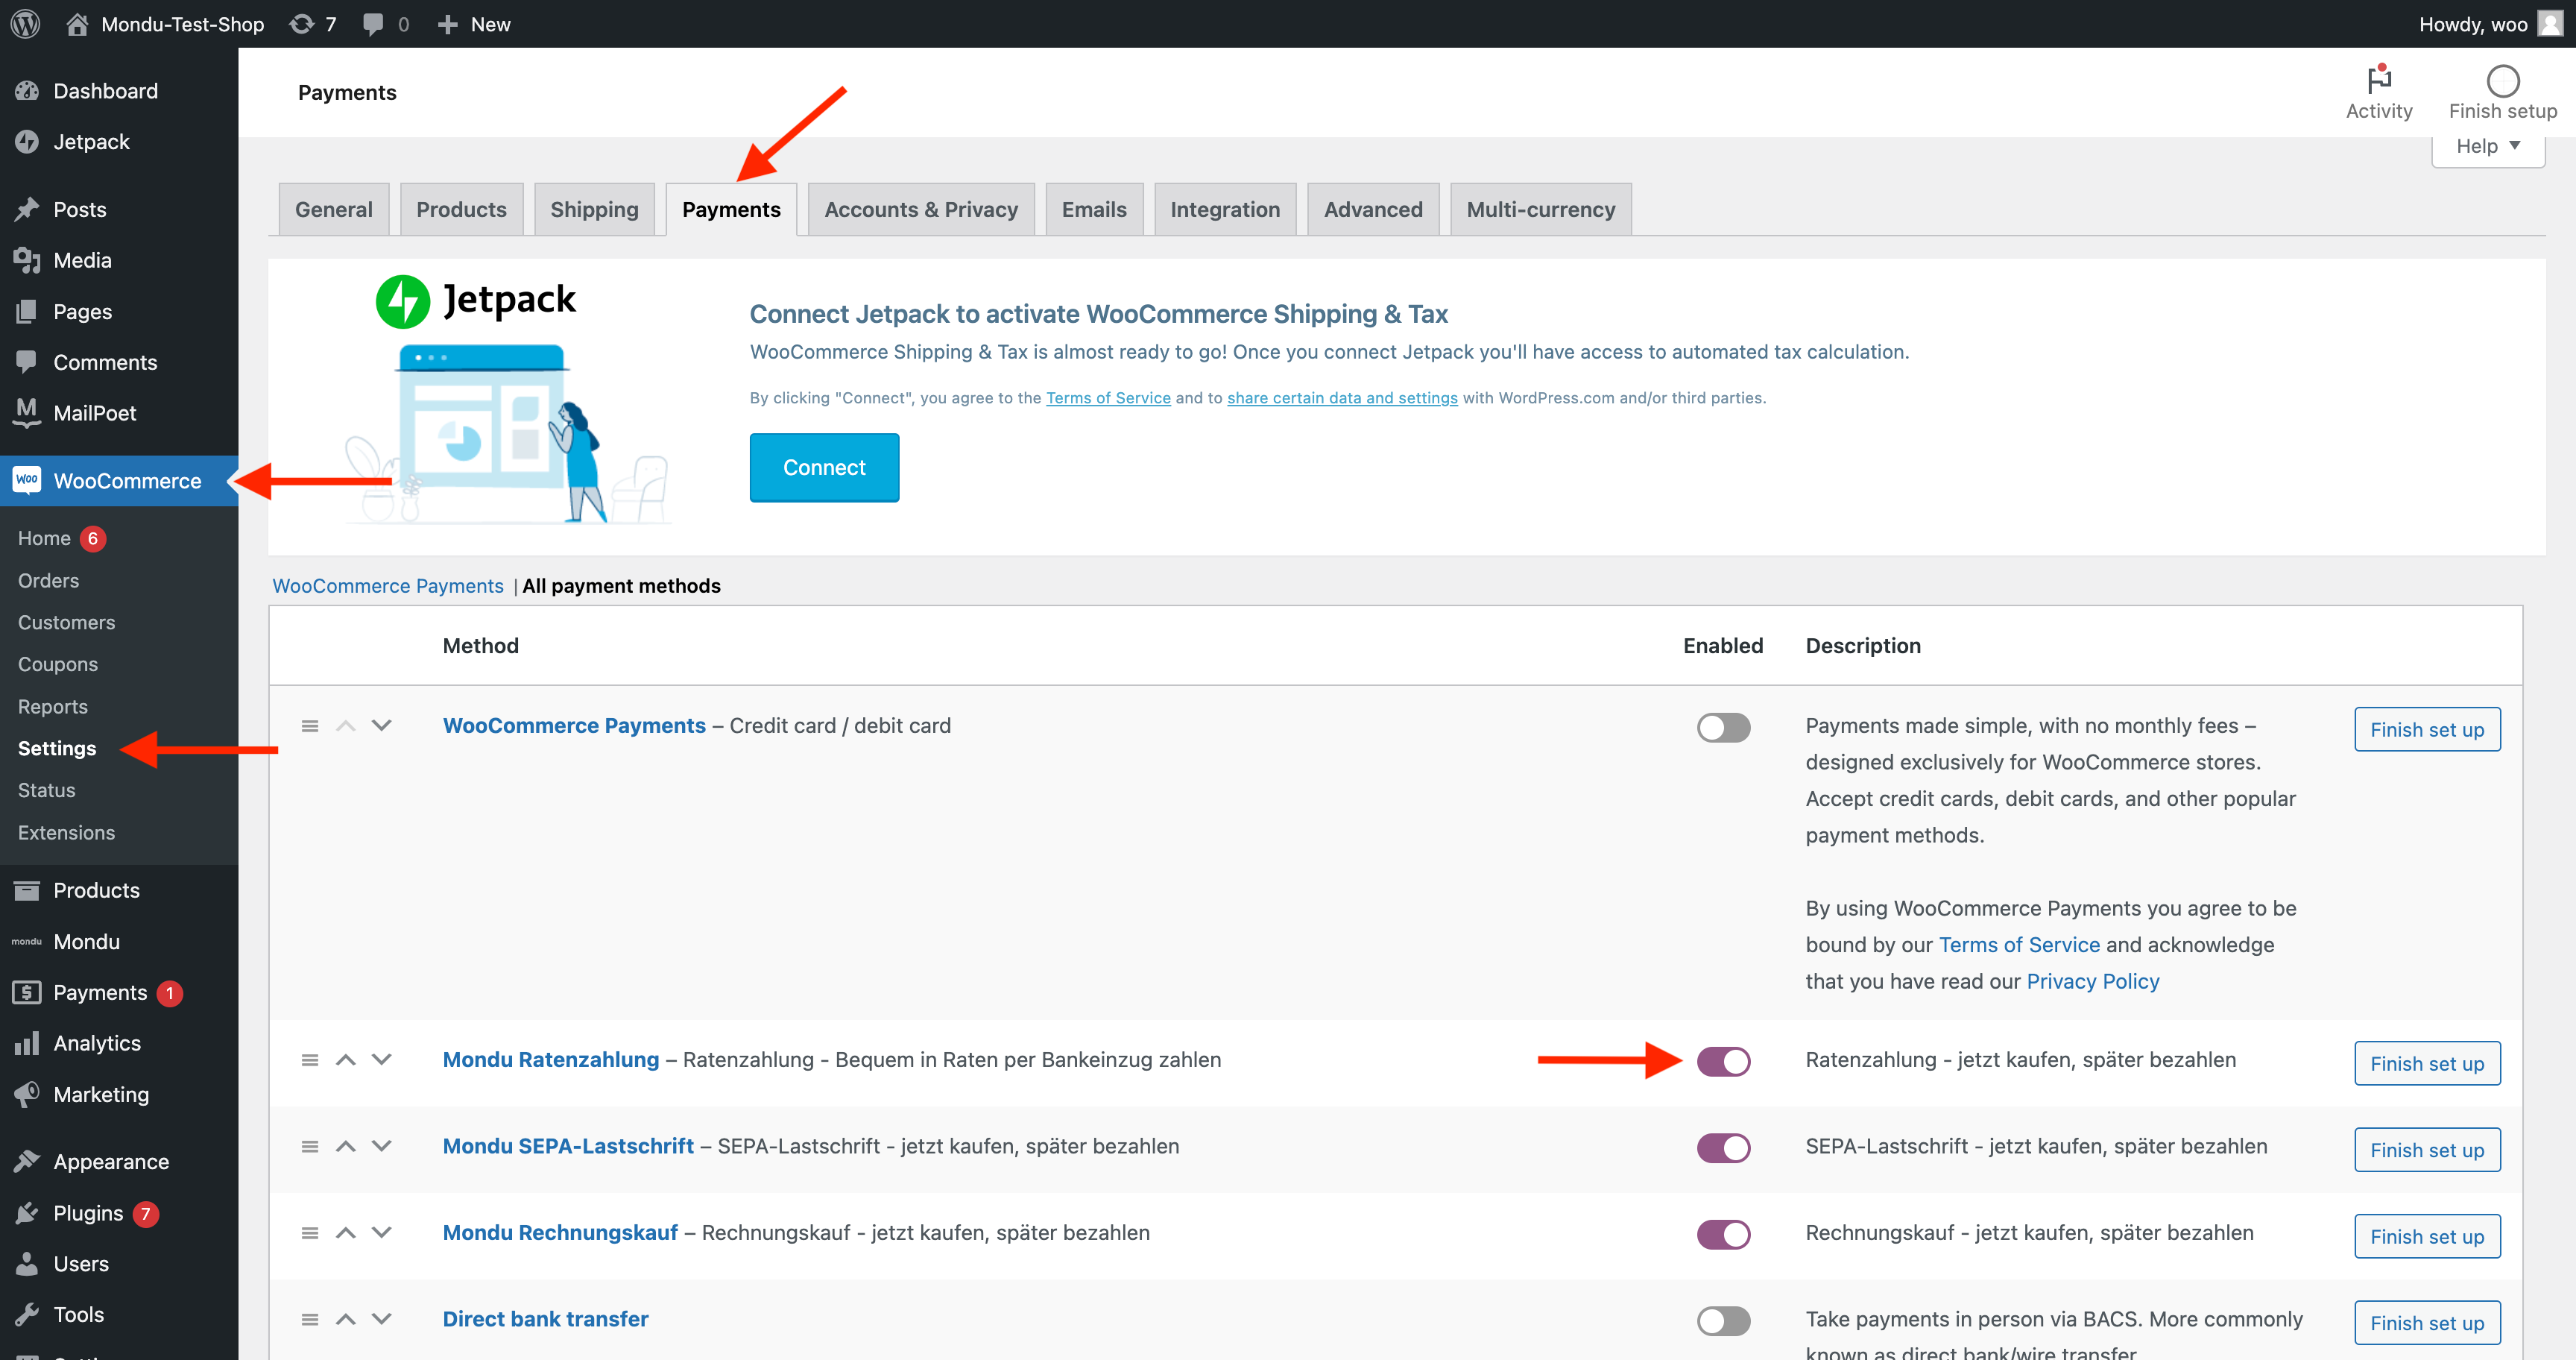
After that, the active Mondu payment methods should appear in the page listing payment options.
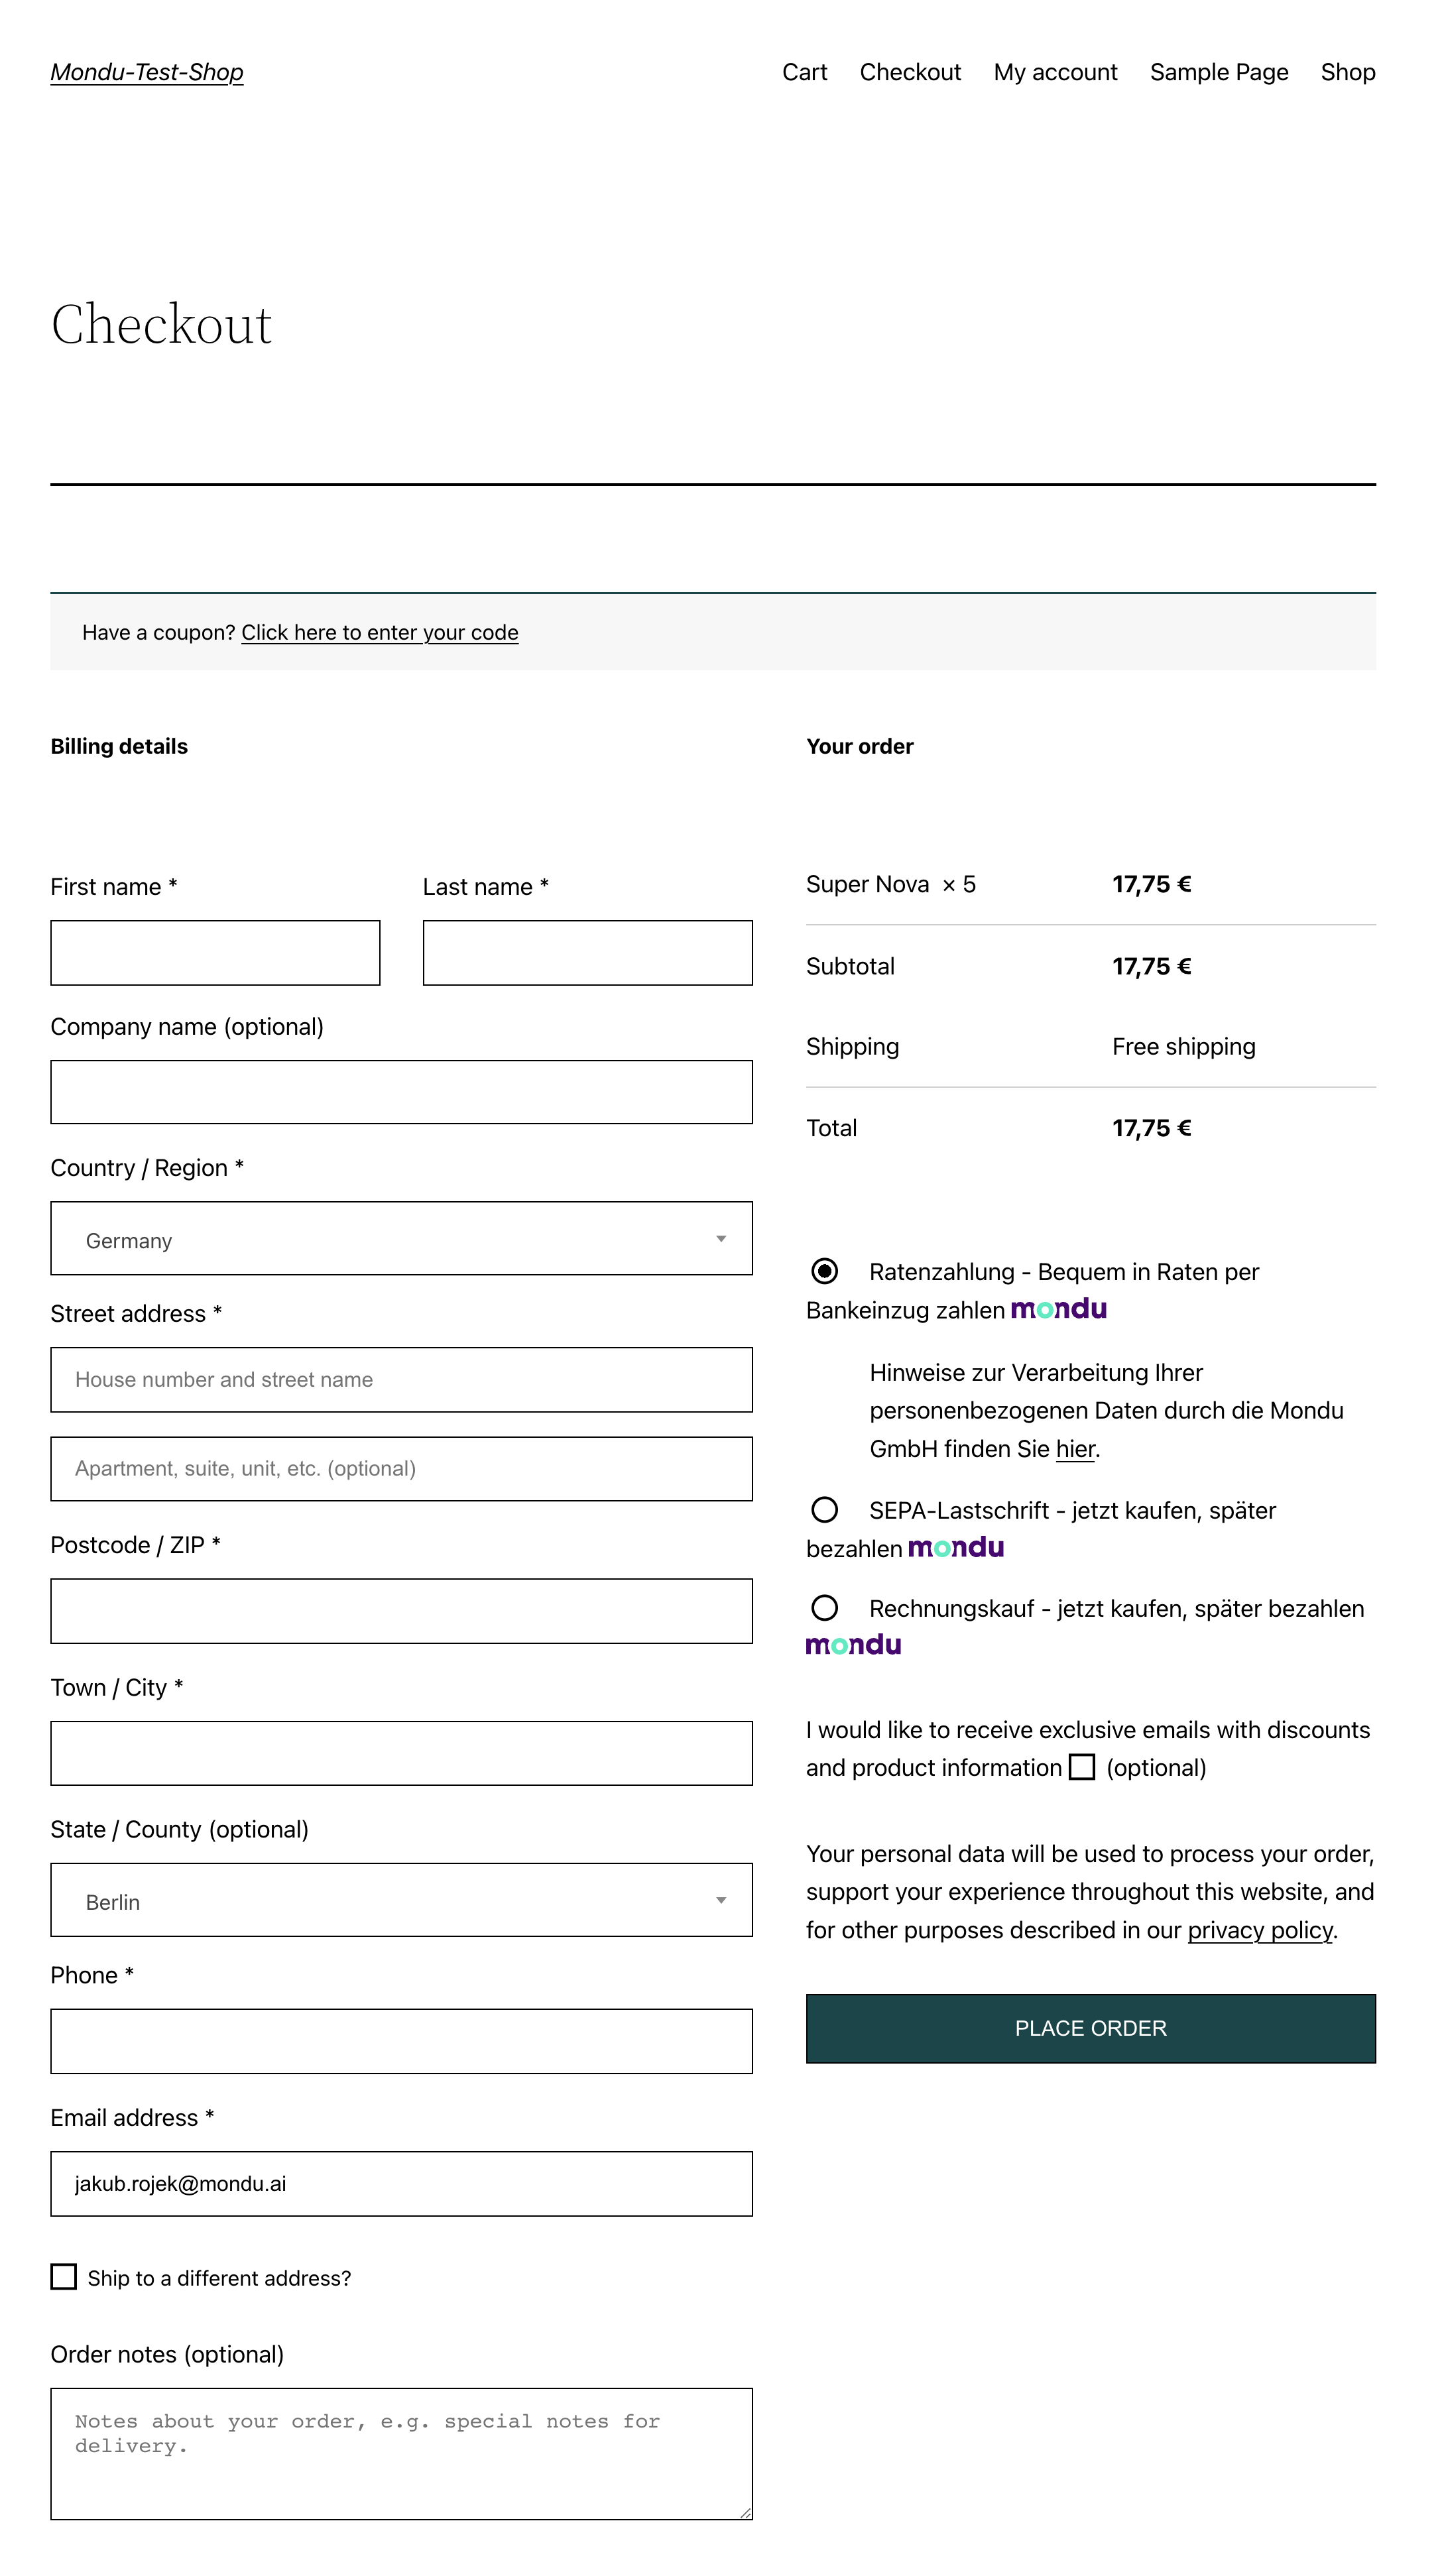
If one of the Mondu payments is chosen, Mondu widget will appear on the screen after clicking the “Buy now” button.
Troubleshooting
In case of any problems with plugin configuration or usage you can inspect the activity logs created by Mondu plugin to get more insights on the nature of the issue.
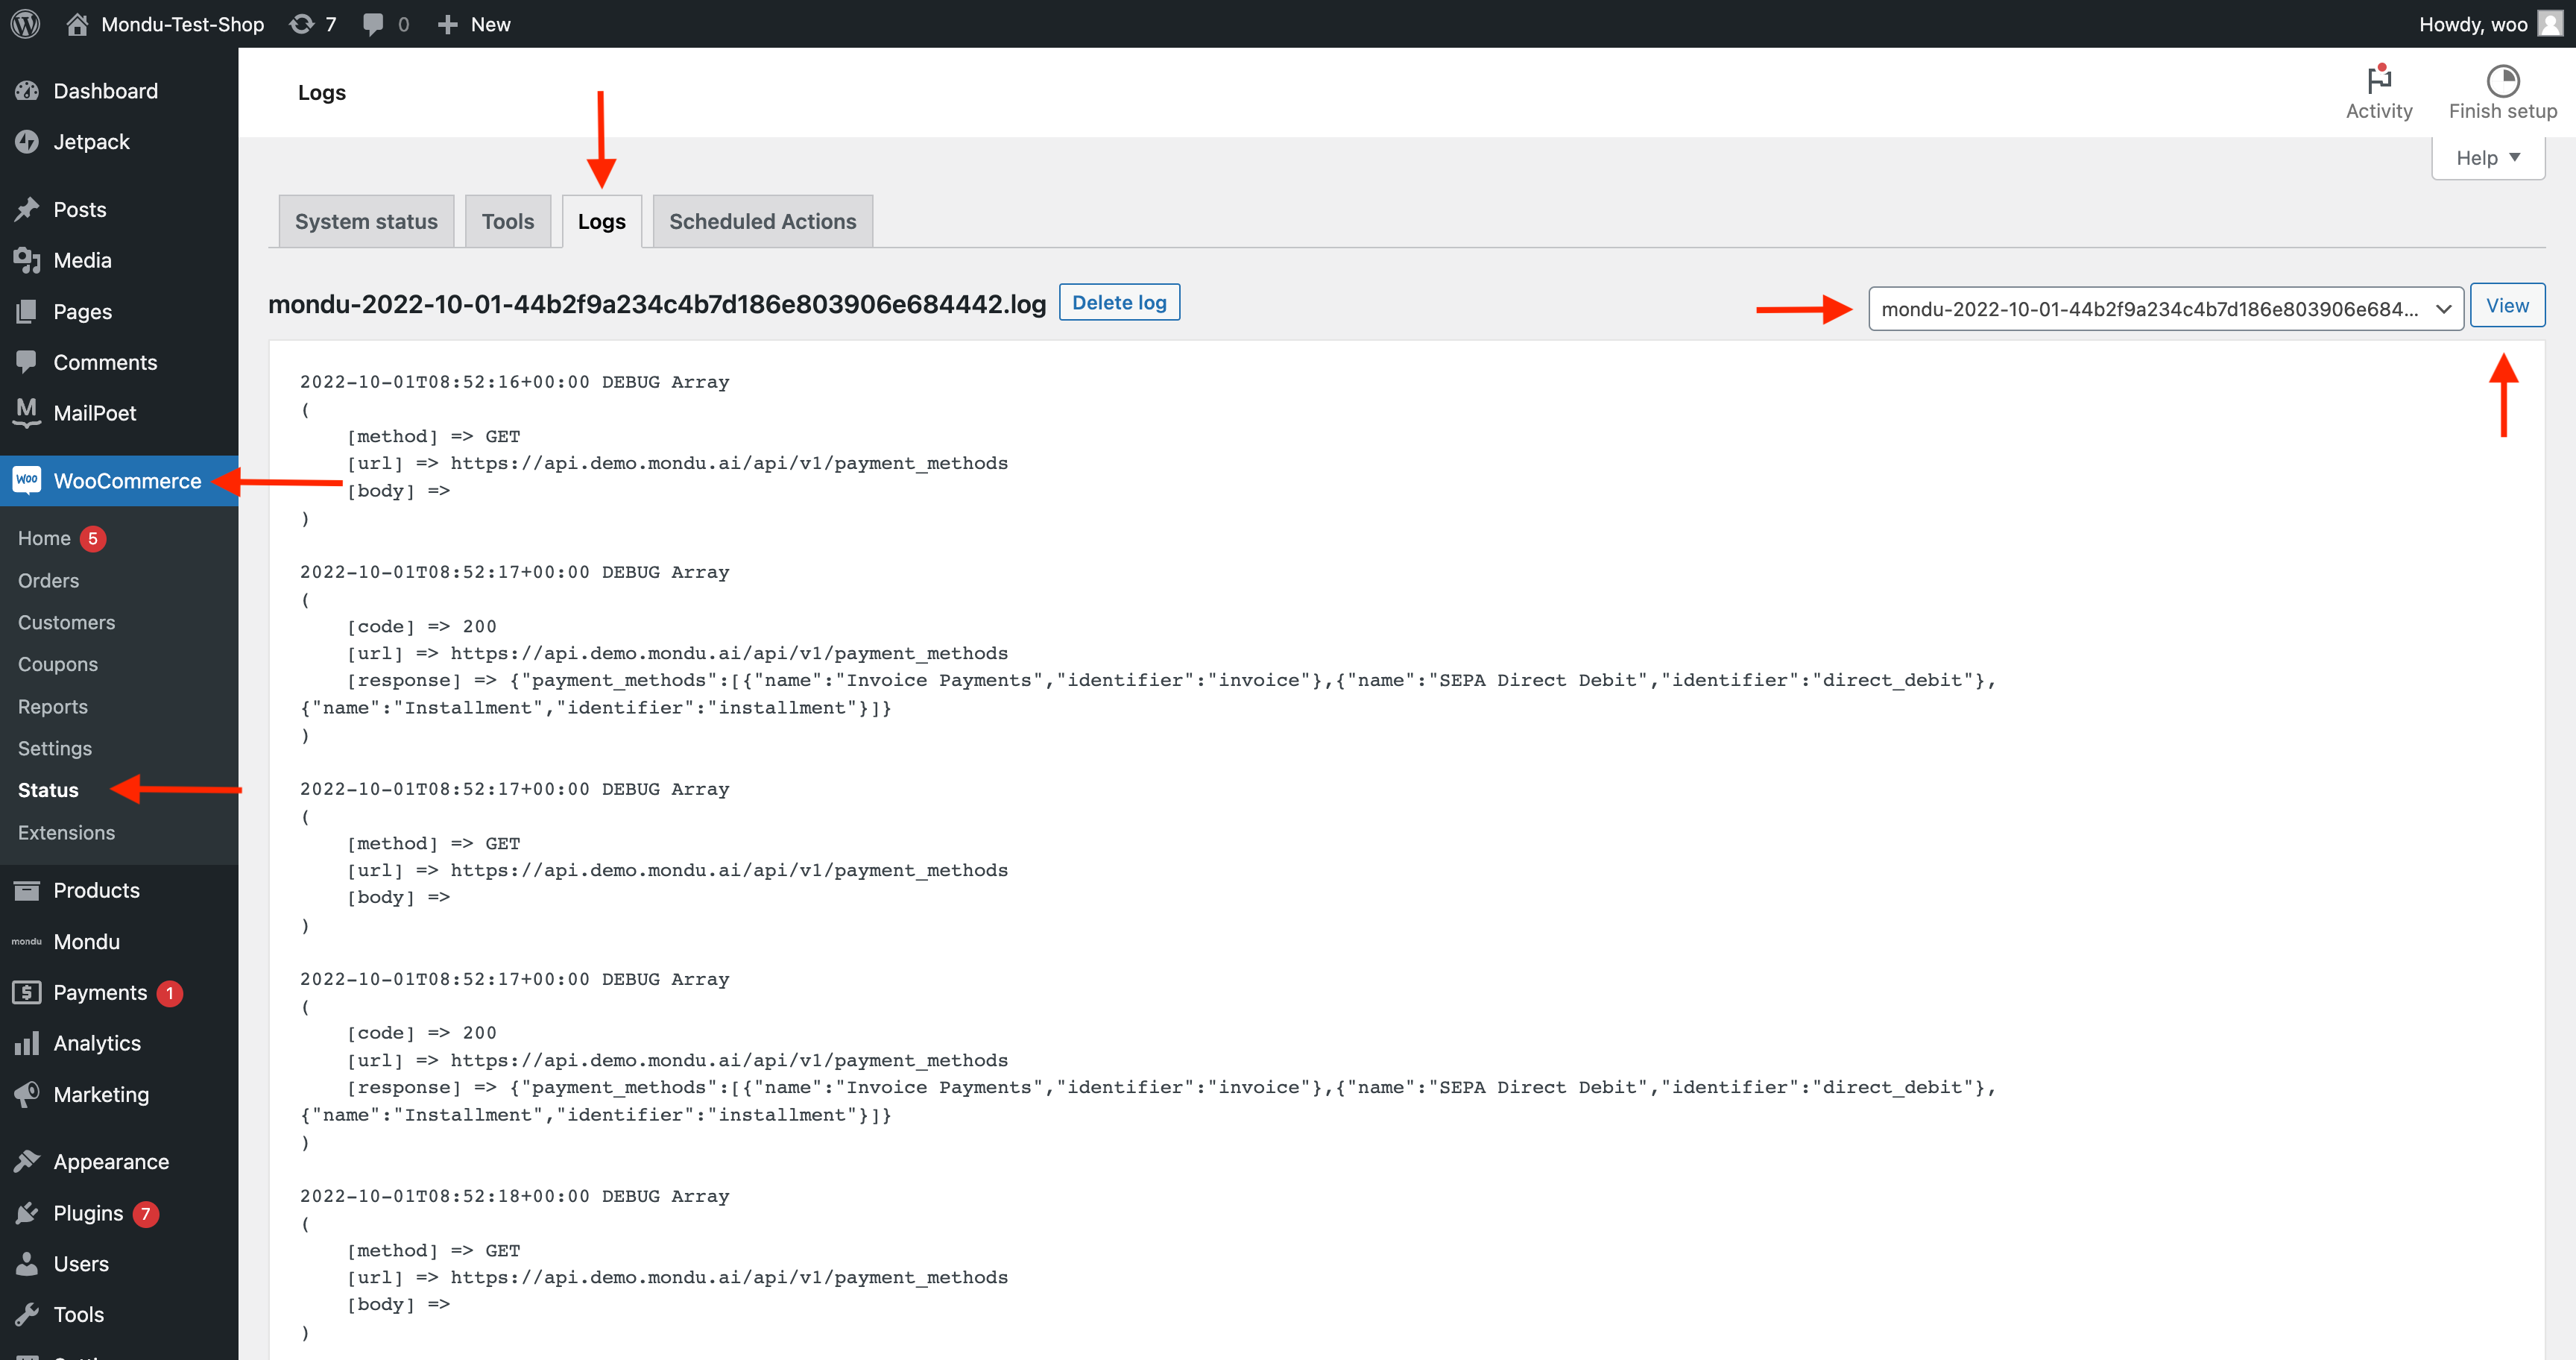
One can alternatively look into the Mondu logs using standard WooCommerce status tools. In order to view the logs
- go to WooCommerce > Status section
- click on Logs tab
- select Mondu logs from the dropdown list
- click view
Updated 3 months ago